RETRO POSTER
The aim of the Retro Poster is to make it look as if it were made for the 60's/70's time period, constructed by different aspects in Photoshop.
On a new A3 page, the background was first filled with a purple and green gradient by dragging the tool diagonally across the canvas. A new layer was then created from the channels section and a blue background was dropped onto the whole of the page with the paint bucket. From here, the pixelate option was selected from the filter tab on the top tool bar and the colour halftone radius was set to 79px. This covered the page in black dots which were then selected and copied before being pasted back onto the halftone layer. The colour of the halftone layer was then changed to purple by right clicking on the layer and going to the colour overlay found in the blending options.
Another new layer was added on top of the halftone layer and filled in red with the paint bucket. The same pixilation settings were then added to this layer and the blending options were changed from Normal to Difference rather than the colour overlay being varied, resulting in the final background product.
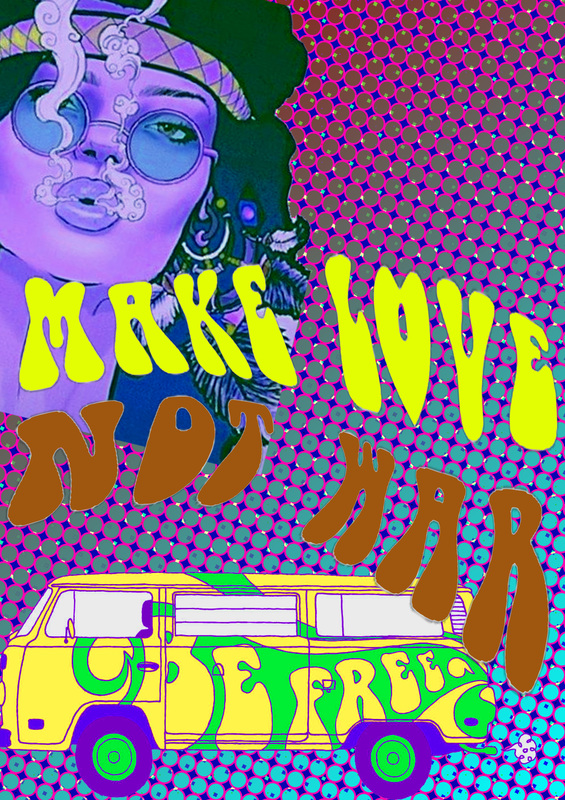
Both the hippie face and the van images were downloaded and the colour balance was varied in the image adjustments tab to enhance the purples and yellows. The font was also downloaded and filled in with the paint bucket before it was warped to create the dragged/distorted effect by clicking on the transform option found in the edit tab.
On a new A3 page, the background was first filled with a purple and green gradient by dragging the tool diagonally across the canvas. A new layer was then created from the channels section and a blue background was dropped onto the whole of the page with the paint bucket. From here, the pixelate option was selected from the filter tab on the top tool bar and the colour halftone radius was set to 79px. This covered the page in black dots which were then selected and copied before being pasted back onto the halftone layer. The colour of the halftone layer was then changed to purple by right clicking on the layer and going to the colour overlay found in the blending options.
Another new layer was added on top of the halftone layer and filled in red with the paint bucket. The same pixilation settings were then added to this layer and the blending options were changed from Normal to Difference rather than the colour overlay being varied, resulting in the final background product.
Both the hippie face and the van images were downloaded and the colour balance was varied in the image adjustments tab to enhance the purples and yellows. The font was also downloaded and filled in with the paint bucket before it was warped to create the dragged/distorted effect by clicking on the transform option found in the edit tab.